Did you know that, as an African merchant, you can accept local and international payments from customers with Paystack via your WordPress site and WordPress eCommerce-related plugins?
In this post, you will learn three or more easy methods to start accepting online payments from your prospective and existing clients using Paystack on your WordPress website.
Let’s get right into it!
In This Article
- 1 What Is Paystack?
- 2 Why Choose Paystack To Collect Payments On WordPress Sites?
- 3 Using the Paystack WooCommerce Payment Gateway for Your Online Store
- 4 How To Accept Payments On Your WordPress Site With Paystack Forms
- 5 How to Set up Paystack Forms on Your WordPress Site
- 6 WordPress Plugins And Platforms That Support The Use of Paystack Payments
- 7 Frequently Asked Questions About How to Collect Payments on WordPress Sites With Paystack
- 8 Start accepting payments on your WordPress and WooCommerce site using Paystack
- 9 Never miss stuff like this!
What Is Paystack?
Paystack is an online payment gateway designed specifically for African online and offline merchants. It helps businesses in Africa receive payments from anywhere in the world. Several hundred thousand users are currently using Paystack to scale their businesses.
The fintech company is backed by notable investors such as Stripe and Visa, and its goal is to cover the entire African continent in the coming years.
Paystack currently operates in seven African countries, including Nigeria, Ghana, Kenya, Rwanda, Egypt, Côte d’Ivoire and South Africa.
This means that businesses in these countries can easily accept both local and international online payments on their WordPress sites.
The acquisition of Paystack by Stripe is a big step towards the acceleration of online commerce in Africa.
Why Choose Paystack To Collect Payments On WordPress Sites?
Just like Flutterwave, Paystack also makes it easy for WordPress site owners to accept payments from customers in various ways.
For example, someone who runs an e-commerce website powered by WooCommerce or SureCart can decide to allow customers to pay through methods like credit and debit cards, bank transfers, USSD, Apple Pay, VISA QR, mobile money, and so on.
You can achieve the following with Paystack integrated into your WordPress site:
- Accept Payments with credit and debit cards, QR codes, Apple Pay, and much more with no website redirects.
- Receive recurring payments based on subscriptions.
- Collect one-time and recurring payments with well-documented APIs from your apps and websites.
- Moderate pricing plans with Zero integration fee and Zero maintenance fee.
- Verify and accept payment with ease.
- Split transaction payouts into multiple accounts.
- Get paid by customers anywhere in the world.
- Receive your money automatically in your bank account within 24 hours after payment is made.
That being said, let’s look at the various methods you can use to collect payments on your WordPress site. Simply use the links below to jump to the method you prefer.
- Method 1. Use Paystack WooCommerce Payment Gateway
- Method 2. Use Paystack Payment Forms on WordPress
- Method 3: Use Paystack With Other WordPress eCommerce Plugins
- Frequently Asked Questions
- Conclusion
Using the Paystack WooCommerce Payment Gateway for Your Online Store
This method is best for businesses that want to start selling physical goods on their WordPress sites.
- Create a Paystack account
- Have an online store already built with WooCommerce
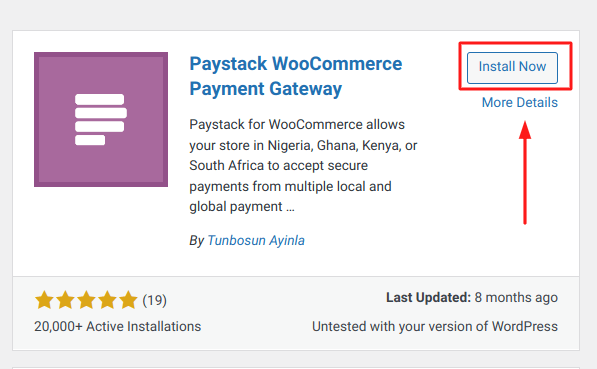
- Install the Paystack WooCommerce plugin in WordPress
- Connect your Paystack account to WordPress using the Paystack API key.
- Set payment options
- Test the integration
- Go live by switching to Paystack Live.
Continue reading for step-by-step instructions:
To start collecting payments on your WordPress site, ensure you first create a free account on Paystack.
Then, simply install and activate the e-commerce plugin called WooCommerce and the Paystack WooCommerce plugin. For starters, here’s a detailed guide on how to start a WooCommerce store on your WordPress site.
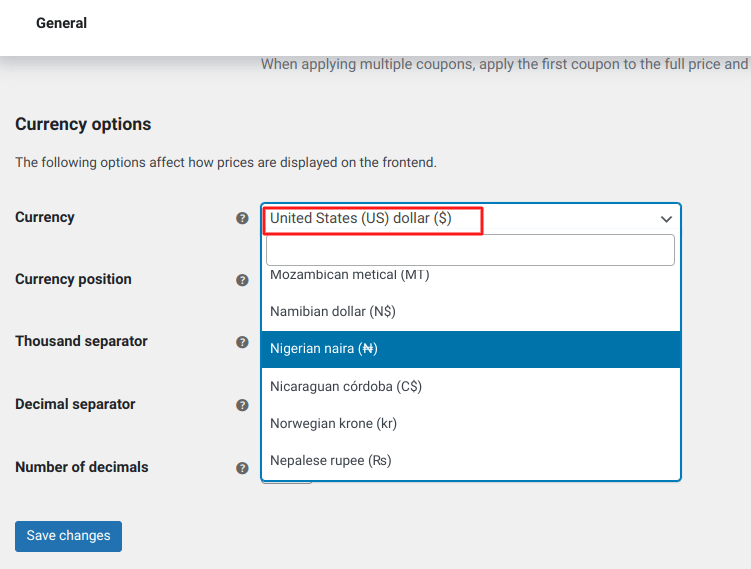
Once both plugins are installed on your site, visit the Paystack WooCommerce settings area, and click on the general section to first set your currency.
Now head over to the Payments section to configure your payment gateway.

Configure other options such as split payments, adding live and secret keys, popup and redirect options, and so on.
Note:
Ensure you try the test mode before going live to confirm you can receive payments. After that, you can then generate both the secret and live keys.

Make sure to select the save buttons after finishing the configuration to avoid having to repeat the setup. Your WordPress site with WooCommerce is now ready for collecting payments.
Next, let’s cover the process of adding the Paystack Forms plugin to your WordPress site.
How To Accept Payments On Your WordPress Site With Paystack Forms

Paystack Forms allows you to process single transactions or set up recurring billing cycles (weekly, monthly, or yearly) for the products and services offered through your WordPress website.
This digital payment solution is ideal for subscription-based companies, religious institutions, and various NGOs. Furthermore, educators and academic institutions can collect membership fees directly from their own web pages.
To implement a Paystack Form on your site, you must first have an active Paystack account and log in to generate payment links. I will explain how to integrate these links into your WordPress site shortly.
Afterward, navigate to Payment Pages within your Paystack account and select the specific page style you require, as illustrated in the image below.
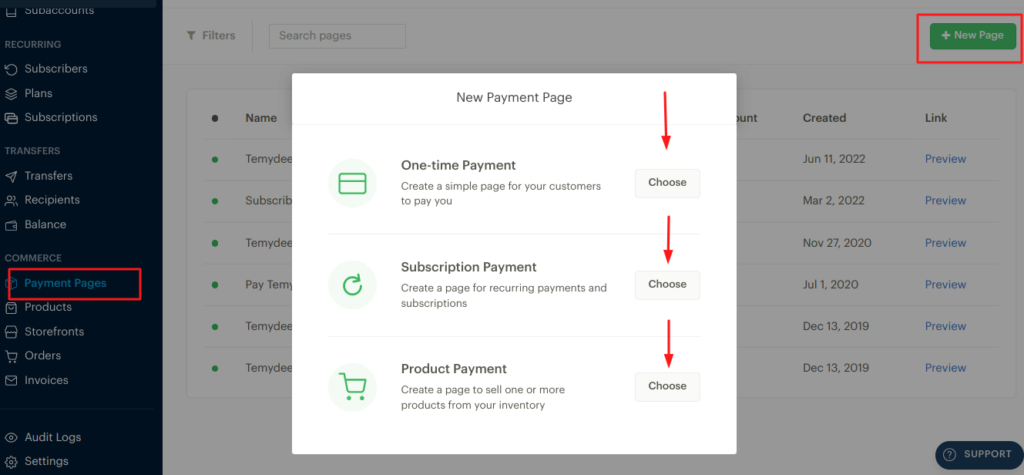
The payment options above include One-time, Subscription, and Product payments. Choose the one that fits your business and proceed with the other steps.
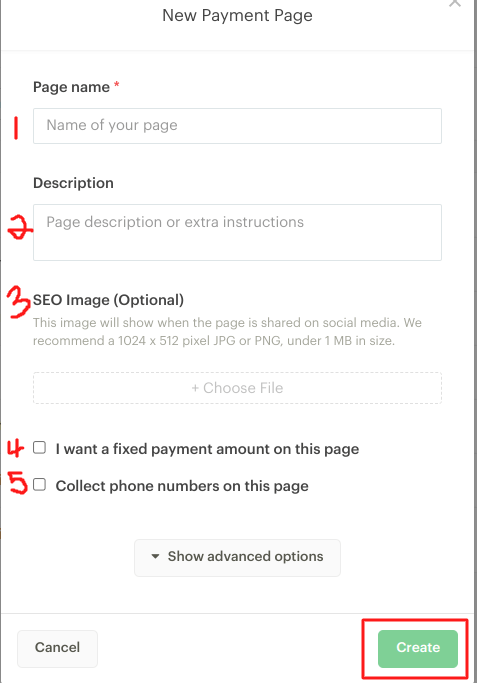
Option 1: One-time Payment Plan Setup
Choose the one-time payment setup option to set up your payment page. Enter the page name, description, and other details before you hit the create button. You can always re-edit your information after you preview it.
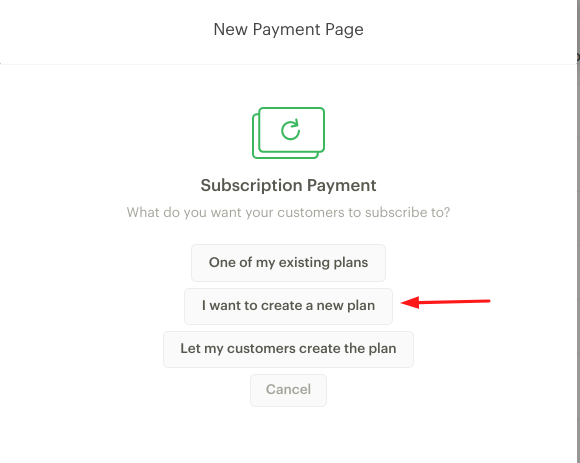
Option 2: Subscription Payment Plan Setup
To set up a Paystack subscription payment plan, choose the option above, and proceed with the type of plan as shown below.
Click on the Create button after you have entered your details. Preview and come back to edit to suit your business.
Option 3: Product Payment Plan Setup
For those who don’t have a website, the Product payment plan lets you create a page to sell one or more products from your inventory. Once you create this page, you can share the product payment link to your prospective customers on your profile page on all social media handles or instant messaging apps.
To create a product page, enter the product details and preview link before you save and begin to share with prospective customers. You can repeat this process as many times as you like.
How to Set up Paystack Forms on Your WordPress Site
Once your payment pages and links are ready, you can set them up on your WordPress website. There is no need to worry about users being sent back to Paystack, as every transaction occurs right on your site.
To start, install and enable the Paystack Forms plugin, then go to the settings page to input the required information as demonstrated below.
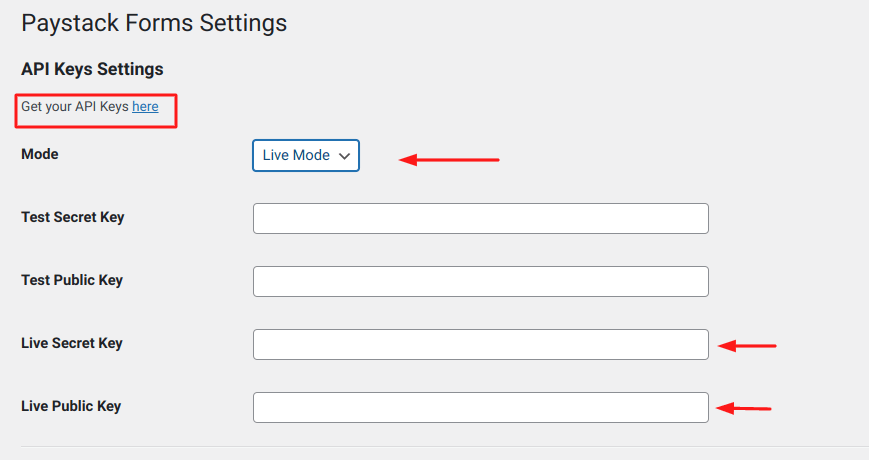
Create your API credentials within the Paystack dashboard and input them into the designated fields as shown in the image above.
Select Test mode to perform a trial payment. Switch to Live mode when you are prepared to process actual transactions.
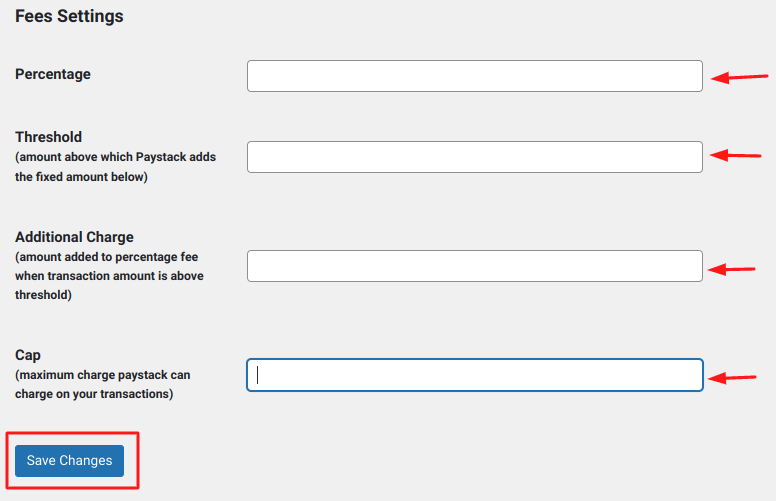
Move on to the next phase of the settings page, which is the fee settings as seen in the image above. Enter the following details:
- Percentage: The amount of how much you want to share per transaction. E.g 1.5%
- Threshold: The amount which Paystack adds as fixed.
- Additional charge: the amount added alongside your percentage fee.
- Cap: is the maximum charge Paystack can charge on your transaction.
If you are stuck anywhere, contact Paystack’s support team for guidance.
Lastly, ensure you click the save changes button and move on to the next part, which is adding the forms you created on your Paystack Dashboard.
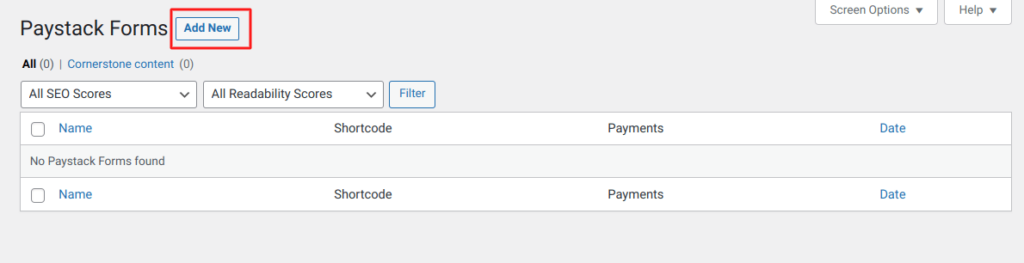
Navigate to the Paystack Forms area within your WordPress admin panel and select Add New, as shown in the previous graphic. Provide the required information and press the Publish button.
Once live, visitors or clients can view and interact with the page on your site. This is the process for accepting payments on WordPress through Paystack Forms.
WordPress Plugins And Platforms That Support The Use of Paystack Payments
Paystack also enables African e-commerce vendors and business owners using WordPress to accept transactions through several well-known plugins.
Some of these are available for free within the standard WordPress plugin directory, while others operate via a complimentary Paystack integration.
Below is a compilation of popular WordPress plugins and systems that are compatible with Paystack for processing payments:
- SureCart: A WooCommerce alternative which enables WordPress users to create an online store with unlimited features.
- The Events Calendar Plugin: This WordPress plugin is used by various event management businesses to manage and sell online tickets, RSVPs and event services. African vendors and organizers who sell events with WordPress can install and activate the Paystack Gateway for The Events Calendar plugin to collect payments on event marketplaces and much more.
- MemberPress Plugin: MemberPress is a popular online membership and LMS plugin for WordPress that allows you to sell various levels of memberships, including software downloads, premium subscriptions, online courses, and so much more. With the Paystack for MemberPress plugin, WordPress membership sites can collect payments from members with multiple payment options.
- Restrict Content Pro Plugin: A powerful WordPress membership and subscription management plugin that helps content creators restrict content and manage member subscriptions with recurring payments and much more.
- Sprout Invoices: Send customizable invoices to customers and collect multiple payments with Paystack integration right from your WordPress site.
- Easy Digital Downloads Plugin: Paystack allows merchants who use Easy Digital Downloads on their WordPress sites to collect payments from customers. Easy Digital Downloads is one of the best WooCommerce alternatives for selling digital products and services. Easy Digital Downloads users can integrate the Paystack payment gateway plugin to start accepting payments on the go.
- Gravity Forms Plugin: Gravity Forms is a premium plugin that allows WordPress users to collect both one-time and recurring payments on all types of forms.
- GiveWP Plugin: This WordPress plugin lets you accept online donations and charity deeds with Paystack payments.
- Ecwid E-commerce: An eCommerce solution that helps African merchants sell everywhere online simultaneously and collect payments using Paystack payments integration.
Frequently Asked Questions About How to Collect Payments on WordPress Sites With Paystack
Start accepting payments on your WordPress and WooCommerce site using Paystack
Many African entrepreneurs face challenges receiving online payments via WordPress, hindering their e-commerce and online business ventures, but Paystack offers a solution.
Start accelerating your online business with Paystack Payments on your WordPress site today. It’s a great way to make transactions more seamless for your customers. Why not give it a try?
Paystack offers various businesses using WordPress the two easiest ways to collect payments:
- Go for Paystack WooCommerce if you sell physical or non-physical goods online.
- Go for Paystack Payment Forms if you sell either one-time or subscription-based services.
- Use any of the WordPress plugins that support Paystack to collect payments on your WordPress site.
PS: If you need a helping hand in integrating the Paystack payment gateway on your WordPress site, kindly reach out for premium support.
Disclaimer: TemydeeDigital may be an affiliate for one or more products mentioned in this article. If you click a link and complete a purchase, we may earn a commission.


